

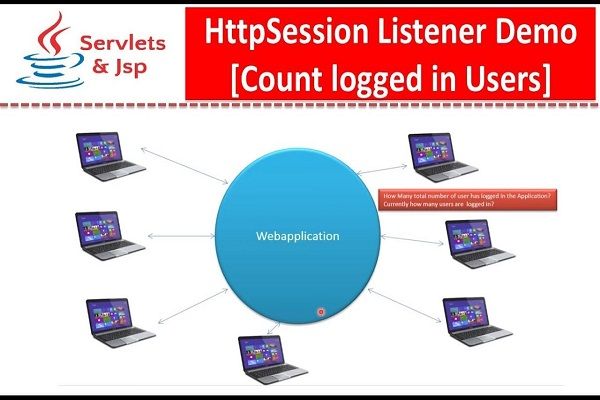
How to Use Session in Java Servlets
A session is a way of keeping track of different activities across multiple requests. It simply implies that each time a user queries the server, it interprets the interaction as a new request.
We must, therefore, keep track of a user's current status to recognize them.
The Servlet application employs four distinct session approaches. These are HttpSession, Cookies, Hidden Form Field, and URL rewriting.
In this article, we will focus on HttpSession.
Prerequisites
To follow along, you'll need to install the following tools:
- An open-source Java IDE, such as Eclipse, NetBeans, etc. In my case, I will be using Eclipse IDE 2021-09 Linux x86_64.
- The Java Development Kit (JDK). In my case, I'll be running Linux with the default version of Java (JDK-11).
- A server. In my case, I will be using the
TomCat server - version 9.0.53. - You also need some basic knowledge of core Java, Servlets, JSP, and basic HTML tags.
Table of contents
- The HttpSession and its function
- HttpSession object
- HttpSession interface methods
- HttpSession example
- Conclusion
The HttpSession and its function
HttpSession is an interface for binding items together and manipulating session information such as session ID, creation time, and last seen.
Function
It's used to connect objects and manipulate information about the session. It also includes elements such as session id, time created, and last seen.
How does HttpSession work?
- When a client sends a message or request, a servlet
containercreates a unique session ID (identifier) for that particular user and sends it back to the client in the form of a response. A temporary session is created by the servletcontainer. - The client returns the session ID (identifier) with each request. This makes it simple for the servlet
containerto determine the request origin. - Finally, the servlet
containerfinds the ID (session identifier) that correlates with the request using an ID (session identifier) retrieved from a client computer.
Advantages of HttpSessions in servlets
- Session information is secure and visible.
- The client's browser has no bearing on session usage as compared to cookies, which are browser-dependent.
- A session can store different items including texts, databases, and datasets.
HttpSession drawbacks
- There is a performance overhead since the session object is stored on the server-side.
- Data serialization and de-serialization are also a challenge.
HttpSession object
HttpSession object helps to keep track of a client's session. From the HttpSession object, we can save, get, or delete attributes.
How to create HttpSession object?
We can create HttpSession object using HttpServletRequest or the getSession() method.
Using getSession() method
In this case, a non parameterized getSession() method returns a session, if it already exists or creates a new session if it does not.
HttpSession session = request.getSession();
Using the parameterized getSession(boolean) method, it returns a new session if we pass the true parameter.
Creating a new session
We create a new session using the code below:
HttpSession session = request.getSession(true);
Fetching a pre-existing session
getSession(false) fetches a pre-existing session.
HttpSession session = request.getSession(false);
Destroy existing session
invalidate() method destroys a session object.
session.invalidate();
HttpSession interface methods
The following are some of the most important Servlet HttpSession methods:
String getId()- A unique session identifier (id) is returned with a typeString.getSession()- It returns a session that exists or creates a new session if not.getSession(boolean I)- It creates a new session ifiistrue, and returns an existing session ifIisfalse.getCreationTime()- It provides the time measured in milliseconds from the beginning of the session at midnight onJanuary 1, 1970.getLastAccessedTime()- It returns the last time the client submitted a session-related request.invalidate()- This method destroys a session object.isNew()- If the session is new,trueis returned, elsefalse.setMaxInactiveInterval(int interval)- The time in seconds after which theservlet containerwill expire is specified.getMaxInactiveInterval()- The maximum time interval per second is returned.
HttpSession example
In this example. We will demonstrate the use of HttpSession.
We will be using login and logout pages to see how HttpSession prevents direct access to the secured pages.
In this case, index.jsp is a secured page.
A user is required to provide the correct credentials to access the content of the index.jsp page.
I strongly advise you to copy and experiment with the following code.
Steps to create the project
Create a new dynamic web project in the Eclipse IDE for Java EE developers, and give it a name. In my case, I'll call it
HttpSessionDemo.Make a new JSP page with the name
index.jsp. Copy and paste the code below into theindex.jsp:
<!DOCTYPE html>
<html>

<head>
    <meta charset="ISO-8859-1">
    <title>welcome page</title>
</head>

<body bgcolor="silver">
    <h1>Welcome.</h1>
    <form action="LogoutAction" method="post">
        <input type="submit" value="logout">
    </form>
    <%
    if(session.getAttribute("userName")==null)
    {
      response.sendRedirect("LoginPage.jsp");
    } %>
</body>
</html>
- Make a new JSP page called
LoginPage.jspand save it. Copy the code below and paste it into theLoginPage.jspfile.
<!DOCTYPE html>
<html>

<head>
    <meta charset="ISO-8859-1">
    <title>Login page</title>
</head>

<body>
    <form action="LoginAction" method="post">
        <input type="text" name="userName" placeholder="Enter user name" required><br>
        <input type="password" name="password" placeholder="Enter your password" required><br>
        <input type="submit" value="login">
    </form>
    <%
      String msg=request.getParameter("msg");
      if("invalid".equals(msg))
      { %>
        Wrong password or username.
      <%} %>
</body>
</html>
- Create a new servlet page and name it
LoginAction.java.
import java.io.IOException;
import jakarta.servlet.ServletException;
import jakarta.servlet.http.HttpServlet;
import jakarta.servlet.http.HttpServletRequest;
import jakarta.servlet.http.HttpServletResponse;
import jakarta.servlet.http.HttpSession;

public class LoginAction extends HttpServlet
{

  public LoginAction() {}

    protected void doPost(HttpServletRequest request, HttpServletResponse response) throws ServletException, IOException
    {
        String userName=request.getParameter("userName");
        String password=request.getParameter("password");

        HttpSession session=request.getSession();
        session.setAttribute("userName", userName);

        if(userName.equals("Chaun")&& password.equals("1234"))
        {
            response.sendRedirect("index.jsp");
        }
        else
        {
            response.sendRedirect("LoginPage.jsp?msg=invalid");
        }
    }
}
- Finally, make a new servlet page called
LogoutAction.java.
import java.io.IOException;

import jakarta.servlet.ServletException;
import jakarta.servlet.http.HttpServlet;
import jakarta.servlet.http.HttpServletRequest;
import jakarta.servlet.http.HttpServletResponse;
import jakarta.servlet.http.HttpSession;

public class LoginAction extends HttpServlet
{
  public LoginAction() {}

    protected void doPost(HttpServletRequest request, HttpServletResponse response) throws ServletException, IOException
    {
        String userName=request.getParameter("userName");
        String password=request.getParameter("password");

        HttpSession session=request.getSession();
        session.setAttribute("userName", userName);

        if(userName.equals("Chaun")&& password.equals("1234"))
        {
            response.sendRedirect("index.jsp");
        }
        else
        {
            response.sendRedirect("LoginPage.jsp?msg=invalid");
        }
    }
}
How to create and run the project
Download and install the Eclipse IDE for Java EE developers
- First, check to see if you have Java installed on your computer using the following command.
java --version
If you don't have Java installed, you'll probably get the following message:
Command 'java' not found, but can be installed with:
sudo apt install openjdk-11-jre-headless  # version 11.0.11+9-0ubuntu2, or
sudo apt install default-jre              # version 2:1.11-72
sudo apt install openjdk-15-jre-headless  # version 15.0.3+3-1
sudo apt install openjdk-16-jre-headless  # version 16.0.1+9-1
sudo apt install openjdk-17-jre-headless  # version 17~19-1ubuntu1
sudo apt install openjdk-8-jre-headless   # version 8u292-b10-0ubuntu1
- Using the command below, install
OpenJDK 11.
sudo apt update
sudo apt install openjdk-11-jre-headless
Visit Eclipse to get the Installer.
Extract the
tar.gzarchive, then go to the "eclipse-installer" folder, right-click oneclipse-inst, and selectrun.When the installation is complete, open eclipse and select launch from the menu as shown below:

Installing Tomcat server
- Make a
System Useraccount.
It's not a good idea to run Tomcat as the root user. Therefore, the Tomcat service will be run by a new system user in the home directory /opt/tomcat.
Enter the following command to add a new user:
sudo useradd -m -U -d /opt/tomcat -s /bin/false tomcat
- To install Tomcat Server, open a terminal and run the following command to obtain the most recent package information:
sudo apt update
Tomcat can be downloaded from their official website. as shown.

Once the download is complete, extract the tar file in the /opt/tomcat directory:
sudo tar -xf /tmp/apache-tomcat-${VERSION}.tar.gz -C /opt/tomcat/
How to create JSP and Servlet pages
- Use the following demonstration to create the servlet pages from the project above.
Right-click on the project name, click on New, and then select the servlet option as shown:

Name your servlet class, as highlighted below:

You can use the above code to create other servlet pages.
- Follow the instructions below to create JSP pages.
Right-click on the project name, then click on New and then select the JSP option as shown:

Name your JSP page and select Finish:

Configuring Tomcat in Eclipse
From the Servers Tab, select No servers are available:

Next, select Tomcat v9.0 Server.

Then add the Apache installation Directory:

Click Finish after adding the Apache installation directory.
When you right-click on the LoginPage.jsp page, you should see the screen below.
To run the project, select Run on the server and press enter.

The following page will appear in the initial browser. Log in using the credentials we specified in LoginAction.java;

You can check out the full code here.
Conclusion
In this tutorial, we've seen how HttpSession works in our applications and its benefits.
We have also looked at some of the most essential methods in HttpSession. You can, therefore, use this knowledge to craft high-quality applications.
Happy coding.
Peer Review Contributions by: Srishilesh P S

Cloudzilla is FREE for React and Node.js projects


